Further Sectioning - A VERY Surprising 'happy accident'

Here you can post pictures and videos to show others.
Message
Author
User avatar
mrsonchus
Posts: 4175
Joined: Tue Feb 03, 2015 9:42 pm
Location: Cumbria, UK

Further Sectioning - A VERY Surprising 'happy accident'

#1 Post by mrsonchus » Tue Jun 16, 2015 6:12 am

Hi all, I've been pretty busy wrestling with my sectioning and staining studies and have some rather surprising and interesting results to show...
As you'll know, I've had recurrent and very troublesome, at times even disappointing, problems achieving good tissue-integrity with any measure of real consistency. Well - my first assumption - using what little knowledge I have and the torn & tattered sections staggering from my microtome's knife, was that the processing was the No.1 suspect - I no longer believe this to be the case for several reasons. The main one being that I've had some sections with very good integrity in the recent past which lead me to tentatively think that at least on occasion, my processing (i.e. chemical) has been good & appropriate.
Then came a happy accidental-discovery - totally unintended and to say the least unanticipated! :) While reviewing some of my 'old' wax-blocks that have yielded poor sections that were torn, tattered and generally a mess I started to dress their cutting-faces gently with a nice fresh single-sided razor-blade (the £1.20 for 10 blades variety) with a view to 'having another try' with them soon. Well as I was trimming what I thought had turned out to be an exhausted (devoid of specimen) wax block I noticed that a part-section had been cut with one of my thin hand-cut slices as I tried to 'polish' the block's cutting-face....
Curiosity as usual led me to investigate - a quick look under the stereo 'scope revealed a (partial) section of the historically difficult (or should that be hysterically :oops: ) Aloe leaf XS! The integrity seemed excellent, the cells, even in the wax, were very clearly defined and totally undamaged - it seemed that the factor in play here may have been either the thickness of the section (thicker certainly than a microtome's 12µ section by far) or the blade itself. This blade was after all a brand-new razor-blade that was surely blemish, nick and damage free at this stage..).

Soooo - "Watson - the game's afoot" as they say! :D

What I did next may sound quite outlandish but here's what I did. I 'stuck' aforementioned razor-blade, in it's unadulterated entirety, onto the hallowed microtome-knife (screaming as I did so :) ) with a large chunk of sticky-tape known in the UK as 'Cellotape' (the clear tape one uses when wrapping a Christmas present for example) and gave it a good squeeze.

It looks horrific and extremely dubious - here's the peculiar arrangement in all it's glory:
Is this a good idea.......gulp..
ws_razor_blade_mosaic.jpg (145.48 KiB) Viewed 12034 times
Ta-da - sections! :D "Probably rubbish" I heard myself mutter darkly..
Here are some of the resulting sections as they 'arrived' from my shiny new £0.09 'replaceable microtome knife with integral securing tape' :D - what fun this is :D ..
This is what I saw - wow, these look good..
ws_razorblade_mosaic.jpg (306.56 KiB) Viewed 12034 times
Now - the partial nature of the sections is due to the specimen being 'at the bottom of the barrel' so to speak, of what I thought was an exhausted block. The point is - look at the integrity of the tissue and indeed the surrounding wax with which the specimen is evidently properly infiltrated - fully and clearly defined cell morphology and a total absence of microtome-knife artifacts/damage! :o
Upon seeing these rather nice sections I pressed on with a maniacal grin! "To de-waxing we dash". Anyway - I stained & mounted the sections and got the best results for the dreaded Aloe-leaf XS that I have ever achieved - by far. Here's a look:
Sectioned with a £0.09 Blade
ws_aloe_mosaic.jpg (481.67 KiB) Viewed 12034 times
Pretty good for a razor-blade and some sticky tape!
These results and others that have several times duplicated this result with different wax-blocks and specimens have led me to the cautious but not I feel unfounded conclusion that the microtome's knife (specifically it's condition - i.e. damaged by my previous misuse and poor technique) is now my final hurdle or at least very nearly so! :D Progress has been made...
Here are some of those further results which when considered in terms of tissue-integrity would appear to support my current conclusion/s:

The Daffodil flower-stalk (pedicel) that's given me so much trouble, looking pretty good, stained with Fast Green FCF in cellosolve and mounted in alcohol-compatible mountant (as per demo video of earlier post).. Pleased now that I didn't hurl the wax-block into the bin after so many poor sectioning-attempts made with it. :D There is some 'smearing' appearance - this is due to the somewhat fragile nature of my Heath-Robinson razor-blade 'fixture' - if you can call it that! Soon perfect the mounting of the blade though. :)
9-image stitch of whole pedicel XS
ws_x4_daff_pedicel_9_stitch.jpg (399.83 KiB) Viewed 12034 times
You'll notice the slight damage to the lower RH area of the outer-epidermis - this was caused by me in my haste - as I gave the section it's final OH rinse to remove excess Fast Green the section folded over onto itself - argghhhh - and I had to put it under the stereo 'scope and carefully rearrange it with forceps and a mounted pin! I got lucky and just about saved the section - lesson learned - carefully does it... :oops:
This section exhibits very good integrity and morphology - I wish I'd counter-stained with a nuclear stain to show more intra-cellular detail though - but at this stage I was pretty pleased to have the section at all! :D
Here's a closer-look - the integrity is good - I'm very pleased and more than a little surprised by my razor-blade results..
Good morphology & integrity
ws_daff_pedicel_epidermis-0012.jpg (326.74 KiB) Viewed 12034 times
In conclusion:
I think I need to buy a new knife for my microtome ASAP.
I think my tissue-processing technique & protocol/s are basically sound and useful.
I will definitely pursue and perfect the replaceable-blade mount using blades bought for about £1.20 for 10! This shouldn't take too long - I'm away for next week but I'll start on it as soon as I get back.
I will start subbing my slides as a matter of course to give better adhesion of the section to the slide's surface, in preparation for the quite harsh de-waxing, staining and mounting stages - no more folding-over for me! I've ordered some Chrome-Alum with which I will make a super-strong subbing-mixture.

Good results at last - albeit by accident and good fortune! :D
I'll have time for some more sections with this method and perhaps a video of it in action, before the weekend with luck!
Back soon with more details...
John B

User avatar
gekko
Posts: 4701
Joined: Sun Oct 12, 2014 7:38 am
Location: Durham, NC, USA.

Re: Further Sectioning - A VERY Surprising 'happy accident'

#2 Post by gekko » Tue Jun 16, 2015 7:58 am

Well, that is great! Excellent results and very beautiful images!! (other than the fact that you need a new knife). Caution: ignorant observations follow: One thing that I mentioned a long time ago, and still puzzles me, is the quest for thinner and thinner sections. I may be wrong, but I think a section that is thinner than the thickness of a cell will result in a section with no living cells. A section exactly one cell thick will have almost no cells intact (a very few cells may just escape the knife). A two-cell thick section will probably have most of the cells whole. A section between one and two cells thick will have some cells living and some cut through. Am I wrong (I may very well be!)?

User avatar
mrsonchus
Posts: 4175
Joined: Tue Feb 03, 2015 9:42 pm
Location: Cumbria, UK

Re: Further Sectioning - A VERY Surprising 'happy accident'

#3 Post by mrsonchus » Tue Jun 16, 2015 9:35 am

gekko wrote:Well, that is great! Excellent results and very beautiful images!! (other than the fact that you need a new knife). Caution: ignorant observations follow: One thing that I mentioned a long time ago, and still puzzles me, is the quest for thinner and thinner sections. I may be wrong, but I think a section that is thinner than the thickness of a cell will result in a section with no living cells. A section exactly one cell thick will have almost no cells intact (a very few cells may just escape the knife). A two-cell thick section will probably have most of the cells whole. A section between one and two cells thick will have some cells living and some cut through. Am I wrong (I may very well be!)?
Aha - your observations are surely correct but maybe assume a slightly different intent - my goal is definitely not for the thinnest section possible. The goal is to give the detail (i.e. information) desired by the user of the section. This doesn't require particularly thin (relatively or indeed absolutely) sections, but that an appropriate thickness be achieved. More than 1-2 cells thick (dependent of course upon the clarity or even intra-cellular arrangement of particular tissue being observed) is in my limited experience usually sub-optimal. Your point seems correct to me - too thin could 'wreck' a cell in terms of it's contents but if you are looking at say morphological cell-arrangements or layouts of tissue then the cell-wall, it's preservation and staining will be paramount.
I tend at this time to be very interested in the actual cell contents and the 'image' that my processing gives of them. For example some of the above pictures show in the case of the Aloe stained with Safranin a pretty good nuclear image - the nuclei look literally to be 'in good shape' and I interpret this (I may be very wrong - but I have to start somewhere) to mean that for this particular specimen, sectioned at this particular level (about 12-14µ) and processed with my current protocol, this result is a success in terms of my desire to preserve cell contents for study as well of course as overall cell-arrangement - seen via the cell-wall image.

With the Daffodil pedicel stained using 'Fast Green' (a non-aqueous formulation) the details of intra-cellular components is very limited, but the cell shapes and layout have been very nicely imaged with the stain, although vascular-bundle detail is very poor - a different counter-stain would complement the Fast Green for this purpose.. The thickness of section is similarly (nominally) 10µ - probably nearer to 14µ I would think.

It seems to me that a good 'average' section thickness for plant-tissue would be within about 8 -> 16µ for a lot of purposes to suit me - I like morphology whilst plant 'systematics' is the real passion that has led me to the microscopic world, when my trusty 'Sherlock Holmes' magnifying glass reached limits that I needed to exceed for a study of the differences in and identification of different species of 'Sow Thistles' (Sonchus) and 'Willowherbs' (Epilobiums). I have a great interest in the study of UK wildflowers - particularly those often called 'weeds' by most. Those interested in the chemical nature e.g. genes etc would probably use different section thicknesses or even 'squashes' as they are interested in chemical information regarding the cell contents.

I believe animal cells (including Human) are sectioned far far thinner than this, in the area of 1 -> 2µ! Now that needs a serious amount of kit and skill that is totally out my my 'do it in your living-room' league! :D

I'm really looking forward to maybe getting a new knife, now that I know how not to wreck it (depends on the progress of my replaceable blade adventure :) ) - or perfecting the replaceable option - and I've already got the next version sketched out, with proper support and clamp-mechanism. I consider the principle to certainly be valid, based upon the results achieved with my somewhat embarrassing prototype! :oops:

To sum up - I would say my main criterion of the many is the perfection of the cut - it's 'cleanness' and lack of damage to the tissue - both are clearly a function of the cutting-edge's condition and sharpness! I've learned this the hard way, and had it 'driven-home' to me by this happily accidental discovery! Such enormous fun! :D
I've much more work to do - but have recently seen a steady if gradual (sounds better than slow :oops: ) increase in the quality of my results that I find very encouraging and extremely satisfying - I'm working towards being able to select whatever plant-tissue I want for my systematics comparisons and to be able to perform a full, detailed, reproducible and permanently recorded study thereof. Meanwhile I'm going to practice the art of the 'whole-mount' for larger tissue-samples - e.g. seeds, anthers, trichomes, all of which are very indicative of a species' identity and systematic relationship to other plants.
Differential-staining is next on my list below the section-integrity that is vital for all following stages of my adventures.

I'll have some more examples and video of the contraption in action soon... Sorry for this rather long-winded reply. :)
Last edited by mrsonchus on Sun Jun 21, 2015 2:22 pm, edited 1 time in total.
John B

User avatar
mrsonchus
Posts: 4175
Joined: Tue Feb 03, 2015 9:42 pm
Location: Cumbria, UK

Re: Further Sectioning - A VERY Surprising 'happy accident'

#4 Post by mrsonchus » Tue Jun 16, 2015 10:06 am

Hi again, here are a few pictures of some extra hand-cuts that I made during my above session - they're of a leaf of the very small 'Germander-speedwell' plant ('weed') which has leaves about 4mm across:
The surface samples are stained with Methylene Blue, the rest are Fast Green FCF..
Here are some at the end of wax-removal, sitting in Histoclear..
ws_g_speedwell_leaf_XS-9.jpg (272.85 KiB) Viewed 12021 times
Surface of epidermis....
ws2g_speedwell_leaf_abaxial.jpg
ws2g_speedwell_leaf_abaxial.jpg (231.24 KiB) Viewed 12021 times
and
ws_g_speedwell_leaf_abaxial.jpg
ws_g_speedwell_leaf_abaxial.jpg (207.77 KiB) Viewed 12021 times
Cross-sections:
ws_g_speedwell_leaf_XS-6.jpg
ws_g_speedwell_leaf_XS-6.jpg (126.1 KiB) Viewed 12021 times
and a closer-look..
ws_g_speedwell_leaf_XS-2.jpg
ws_g_speedwell_leaf_XS-2.jpg (394.79 KiB) Viewed 12021 times
Hope you like them - bear in mind these hand sections have been processed and embedded as per the microtome-sections and so are a bit finer than a live hand-cut section that's unprocessed.

Back soon - lots to do today, may not have much spare time. :)
John B

User avatar
75RR
Posts: 8207
Joined: Sun Oct 12, 2014 2:34 am
Location: Estepona, Spain

Re: Further Sectioning - A VERY Surprising 'happy accident'

#5 Post by 75RR » Tue Jun 16, 2015 2:31 pm

In conclusion:
I think I need to buy a new knife for my microtome ASAP.
Hi mrsonchus,
I recall (it may even have been myself) the suggestion that you contact local/nearby Universities and Colleges to see whether they sharpen their microtome blades or use disposable ones. If they sharpen - internally or outsourced - and you are able to avail yourself of that service, that would be ideal.
Since blades require regular sharpening - having a few on hand would allow you to continue your sectioning while the others were sharpened.
The number of blades you would need depends of course on the turnaround and on how long a blade can be usefully used between sharpenings.
Alternatively, if they use disposable blades, it would be useful to inquire as to their price, lifetime and source.
Zeiss Standard WL (somewhat fashion challenged) & Wild M8
Olympus E-P2 (Micro Four Thirds Camera)

User avatar
Crater Eddie
Posts: 1858
Joined: Wed Nov 12, 2014 4:39 pm
Location: Illinois USA

Re: Further Sectioning - A VERY Surprising 'happy accident'

#6 Post by Crater Eddie » Tue Jun 16, 2015 2:51 pm

Excellent progress! Glad to hear of the happy accident, looks like you have that bit sorted now.
CE
Olympus BH-2 / BHTU
LOMO BIOLAM L-2-2
LOMO POLAM L-213 / BIOLAM L-211 hybrid
LOMO Multiscope (Biolam)
Cameras: Canon T3i, Olympus E-P1 MFT, Amscope 3mp USB

User avatar
gekko
Posts: 4701
Joined: Sun Oct 12, 2014 7:38 am
Location: Durham, NC, USA.

Re: Further Sectioning - A VERY Surprising 'happy accident'

#7 Post by gekko » Tue Jun 16, 2015 3:50 pm

John, please forgive me! I don't know where I left my head early in the morning (probably on the pillow). And I so much appreciate your taking the time and effort to give me that excellent explanation, despite my obviously stupid post. Yesterday I was trying quite unsuccessfully to section a fruit using my hand microtome, and this morning I wrote what I wrote thinking only of my sectioning "technique" which is just cutting through, no fixative, no embedding, nothing. And I completely forgot about the extensive preparation you do! Again, I apologize for being stupid, and again thank you for your patient, gracious, and detailed response despite my having written such a foolish post.

jwsmith
Posts: 70
Joined: Mon Jun 01, 2015 4:15 pm
Location: Berkeley, CA, USA

Re: Further Sectioning - A VERY Surprising 'happy accident'

#8 Post by jwsmith » Tue Jun 16, 2015 4:46 pm

John...you seem oriented toward knife-replacement...
Are not microtome knives readily sharpen-able..??..
What are the drawbacks/hurdles to sharpening a microtome knife.
I am entirely ignorant...don't yet own a microtome
Judd

billbillt
Posts: 2895
Joined: Mon Nov 10, 2014 10:01 pm

Re: Further Sectioning - A VERY Surprising 'happy accident'

#9 Post by billbillt » Tue Jun 16, 2015 5:51 pm

This was an interesting discovery of a cheap fix.... Maybe all you need now is just a support for the razor blade and not have to have the expensive knives...

User avatar
mrsonchus
Posts: 4175
Joined: Tue Feb 03, 2015 9:42 pm
Location: Cumbria, UK

Re: Further Sectioning - A VERY Surprising 'happy accident'

#10 Post by mrsonchus » Tue Jun 16, 2015 6:34 pm

75RR wrote:
In conclusion:
I think I need to buy a new knife for my microtome ASAP.
Hi mrsonchus,
I recall (it may even have been myself) the suggestion that you contact local/nearby Universities and Colleges to see whether they sharpen their microtome blades or use disposable ones. If they sharpen - internally or outsourced - and you are able to avail yourself of that service, that would be ideal.
Since blades require regular sharpening - having a few on hand would allow you to continue your sectioning while the others were sharpened.
The number of blades you would need depends of course on the turnaround and on how long a blade can be usefully used between sharpenings.
Alternatively, if they use disposable blades, it would be useful to inquire as to their price, lifetime and source.
Hi, thanks for your help - the idea of contacting a local university isn't a bad one - it's just that I live in a very rural part of the country - my nearest university is a fair distance away, but more than that, I suspect I would get a very cool response if I approached them. I'm not a professional and to them may well present as 'a strange man talking about botany who would like to know how to achieve a collection of extremely sharp knives!' :)
I'm afraid all sorts of hurdles would get in the way, the ridiculous and dreaded 'health & safety' tripe we have to endure here in the UK, and the constant urge for litigation if someone strains an eyeball reading a book....etc etc.. :cry:
I suppose though, having rambled the above, I could always give them a call and simply inquire - they may not even have an appropriate dept that uses microtomes, but then again, they can only say no.
My understanding is that the rocking-microtome is not able to use the available disposable-blade systems of the rotary microtome world. Also they are very expensive - far more than the microtome itself! :cry:
I'm going to pursue my own adaptation as the blades I have used as posted have shown I think a great potential to fill this gap. I won't however devote more than I consider to be an appropriate and profitable amount of time, effort and of course money to this task, although the effort is worthwhile as the rewards - a dirt-cheap, effective, simple and readily available system, are indeed great. Alternatively of course I may invest in some more knives as I am confident that I now understand how to use them without destroying them!

First job when I return from next-week's trip is to start work on the clamping system - naive as I may be, I really can't see why this shouldn't be entirely possible, after all, I've found that simply 'tape and a finger' can give very serviceable (and in fact superior) results right from the off - and I've repeated and varied this trial with enough success to convince (or at least persuade) me that it is definitely worth pursuing.

Lots of work to do when I return! :D
Thanks again for your helpful suggestions - they're always very welcome and appreciated. :)
John B

User avatar
mrsonchus
Posts: 4175
Joined: Tue Feb 03, 2015 9:42 pm
Location: Cumbria, UK

Re: Further Sectioning - A VERY Surprising 'happy accident'

#11 Post by mrsonchus » Tue Jun 16, 2015 6:46 pm

Crater Eddie wrote:Excellent progress! Glad to hear of the happy accident, looks like you have that bit sorted now.
CE
Thanks Eddie - I'm optimistic - I may be tempting fate but it doesn't seem a particularly difficult task to clamp one or even several blades to what is effectively a rigid bar, in a way that is removable (allowing quick & easy blade-changes) yet secure (stable and rigid), given what I consider to be clear evidence that the blade in question (and of course it is only one example of many such blades available for next-to-nothing) is wholly capable of cutting sections as well as a regular microtome-knife costing about 30x as much and needing constant attention and maintenance that is also very labour-intensive and time-consuming for certain.

I'm going to give it a try, that's for sure - too much to gain not to try after the recent results.... :D If I fail, I've lost nothing and answered what must be an often considered question.
Onward-ho! :D
John B

User avatar
mrsonchus
Posts: 4175
Joined: Tue Feb 03, 2015 9:42 pm
Location: Cumbria, UK

Re: Further Sectioning - A VERY Surprising 'happy accident'

#12 Post by mrsonchus » Tue Jun 16, 2015 6:48 pm

billbillt wrote:This was an interesting discovery of a cheap fix.... Maybe all you need now is just a support for the razor blade and not have to have the expensive knives...
Hi Bill - that's the thought I have at the moment - dare I say (can I hear the thundering-hooves of fate approaching? :) ) it seems entirely possible and effective - surely worth pursuing... :D
John B

User avatar
mrsonchus
Posts: 4175
Joined: Tue Feb 03, 2015 9:42 pm
Location: Cumbria, UK

Re: Further Sectioning - A VERY Surprising 'happy accident'

#13 Post by mrsonchus » Tue Jun 16, 2015 6:57 pm

jwsmith wrote:John...you seem oriented toward knife-replacement...
Are not microtome knives readily sharpen-able..??..
What are the drawbacks/hurdles to sharpening a microtome knife.
I am entirely ignorant...don't yet own a microtome
Judd
Hi Judd - these questions seem to me to be answered without ambiguity when researching the subject online - they are (it certainly seems to me) definitely not readily sharpened. The standard to which they must be brought is very, very hard to achieve for the amateur such as myself, working at home with a tiny budget, limited resources and no technical-training....

My advice to you would be to have a look over some of my posts, which show a lot of the problems encountered throughout the whole process, and decide if you're up for the adventure! :D

p.s. I'm really not inclined towards knife-purchase but see it as a 'plan-B' option (the 'buy my way out' solution) if all else fails. I would absolutely love to have a system that has no sharpening, extremely cheap resource-costs (about £0.09 per blade), an easy & quick method of blade-replacement and an inherent simplicity in use! The razor-blades have demonstrated their potential to my satisfaction and they are definitely my preferred option - but who knows - I may fail miserably, but at least I'll have tried! :D
John B

User avatar
mrsonchus
Posts: 4175
Joined: Tue Feb 03, 2015 9:42 pm
Location: Cumbria, UK

Re: Further Sectioning - A VERY Surprising 'happy accident'

#14 Post by mrsonchus » Tue Jun 16, 2015 7:25 pm

gekko wrote:John, please forgive me! I don't know where I left my head early in the morning (probably on the pillow). And I so much appreciate your taking the time and effort to give me that excellent explanation, despite my obviously stupid post. Yesterday I was trying quite unsuccessfully to section a fruit using my hand microtome, and this morning I wrote what I wrote thinking only of my sectioning "technique" which is just cutting through, no fixative, no embedding, nothing. And I completely forgot about the extensive preparation you do! Again, I apologize for being stupid, and again thank you for your patient, gracious, and detailed response despite my having written such a foolish post.
Hi gekko, your question was in no way stupid - a perfectly reasonable start to a good discussion in my book! I've only just started myself and it must be remembered that I'm no expert either - a lot of my opinions and conclusion may very well be hopelessly daft! :)
The thoughts that I gave in my answer are mine - and may be quite wrong - they seem sound to me, but then I always consider my opinions to be simply the best I can come up with at a given time - I've no training at all in Histology or Botany after all. Any questions any of us pose to each other are valid - simply knowledge waiting to be shared! :D
Keep up with the hand-sectioning - support is everything it seems to me. Try filling your microtome's cylinder with molten wax and your subject, let it harden in the refrigerator for an hour then attack! Alternatively take a look at the 'split-mould' system that I use in some of my earlier posts and videos - it uses 'raw' completely unprepared specimens and works pretty well. :)
My best bit of advice is to start with a simple subject that seems to have a high probability of success to an encouraging degree - for example start with a simple med-soft stem of a diameter of about 5-8mm (e.g. a Geranium stem) - nothing too hard or too mushy. Practice the cutting, handling, method etc - it really takes no time at all to start getting pretty good results. You could even try using the safety-razor-blades I'm experimenting with at the moment - they're surely as good as the usually-included 'cut-throat' razor. The round section may also be more likely to succeed purely because of it's geometry?
Have another go! :D
John B

User avatar
mrsonchus
Posts: 4175
Joined: Tue Feb 03, 2015 9:42 pm
Location: Cumbria, UK

Re: Further Sectioning - A VERY Surprising 'happy accident'

#15 Post by mrsonchus » Tue Jun 16, 2015 10:35 pm

Hi again, I've had a go at combining 3 stains for tissue-differentiation using one of the hand-cut sections from the razor-blade series. It went pretty well, using Fast Green, Crystal Violet and Safranin I've got some pretty good results. My staining is improving slowly....
The section, being hand-cut (during 'facing' of the wax-block in readiness for the microtome) was too thick to mount beneath a cover-slip on a regular slide, so I mounted it in the well of a 'cavity-slide' in alcohol-compatible mountant under an appropriately-sized (18mm dia) round coverslip. As with all the razor-blade sections, tissue integrity and morphology is really pretty good. I've unintentionally cut the section slightly obliquely as can be seen by the 'smudged' effect of the lower & middle LH areas... On the whole though, there's good cellular detail of vascular-tissue, protoplasm and cell-walls, still not included a good nuclear-stain yet though - maybe Methylene Blue could make up a staining foursome! :D

Here are a few quick pictures - I hope you like them..
The whole section:
Complete section x4 stitched
ws_x4_hand_sec_daf_ped_mult.jpg (220.33 KiB) Viewed 11981 times
And a nicely imaged epidermis..
Epidermis
Epidermis
ws_x40_hand_sec_daf_ped_epi.jpg (284.65 KiB) Viewed 11981 times
Moving toward center a bit we see a vascular-bundle with good colour:
Moving inwards a bit
ws_x20_hand_sec_daf_ped_2_s.jpg (410.43 KiB) Viewed 11981 times
Here the ground-tissue cell-walls have been stained by the Crystal-violet..
Oops! - here's the correct ground-tissue image!
ws_x40_hand_sec_daf_ped_gro.jpg (183.19 KiB) Viewed 11969 times
Finally a well-differentiated and colourful vascular-bundle including all three stains:
fully-stained vascular bundle
ws_x40_hand_sec_daf_ped_VB_.jpg (287.17 KiB) Viewed 11981 times
I hope you like them - I'm pretty pleased with them so far. :)

I hope to stain and mount a couple of the microtome-cut (with the razor-blade) sections from
this set tomorrow - If I get time I'll put up a quick post of them. :D
Last edited by mrsonchus on Wed Jun 17, 2015 5:48 am, edited 1 time in total.
John B

User avatar
gekko
Posts: 4701
Joined: Sun Oct 12, 2014 7:38 am
Location: Durham, NC, USA.

Re: Further Sectioning - A VERY Surprising 'happy accident'

#16 Post by gekko » Tue Jun 16, 2015 11:49 pm

mrsonchus wrote:Hi gekko, your question was in no way stupid...
John. you are much too kind! Thank you.

User avatar
gekko
Posts: 4701
Joined: Sun Oct 12, 2014 7:38 am
Location: Durham, NC, USA.

Re: Further Sectioning - A VERY Surprising 'happy accident'

#17 Post by gekko » Tue Jun 16, 2015 11:56 pm

Superb sections and images. Very beautiful, both technically and aesthetically. Do I remember correctly that you expressed an interest in doing oblique imaging? The reason I ask is that the nuclei may (i.e. a guess on my part) show up clearly with oblique light.

Peter
Posts: 226
Joined: Sun Oct 12, 2014 5:34 pm

Re: Further Sectioning - A VERY Surprising 'happy accident'

#18 Post by Peter » Wed Jun 17, 2015 5:02 am

Hi John,
I would recommend you do not purchase a new microtome knife before you have sorted out the how, where, and by whom of sharpening as the new knives may seem sharp but do not have an edge sutable for cutting sections. the manufacturers and suppliers leave it up to the owner - user to affect the final sharpening.
I also would recommend you contact someone at a "nearby" university, you may find them more than happy to help.
Hope this helps.
Peter.

User avatar
mrsonchus
Posts: 4175
Joined: Tue Feb 03, 2015 9:42 pm
Location: Cumbria, UK

Re: Further Sectioning - A VERY Surprising 'happy accident'

#19 Post by mrsonchus » Wed Jun 17, 2015 5:42 am

Peter wrote:Hi John,
I would recommend you do not purchase a new microtome knife before you have sorted out the how, where, and by whom of sharpening as the new knives may seem sharp but do not have an edge sutable for cutting sections. the manufacturers and suppliers leave it up to the owner - user to affect the final sharpening.
I also would recommend you contact someone at a "nearby" university, you may find them more than happy to help.
Hope this helps.
Peter.
Hmm - Peter you make a very good couple of points there - I'm going to contact my nearest Uni' and see what they say or recommend - surely worth a 'phone call or e-mail.... Thanks also for the tip about the final edge-preparation - I'd not given that a thought but I'm certain you're right - thanks it's helpful. :)
John B

User avatar
mrsonchus
Posts: 4175
Joined: Tue Feb 03, 2015 9:42 pm
Location: Cumbria, UK

Re: Further Sectioning - A VERY Surprising 'happy accident'

#20 Post by mrsonchus » Wed Jun 17, 2015 5:45 am

gekko wrote:Superb sections and images. Very beautiful, both technically and aesthetically. Do I remember correctly that you expressed an interest in doing oblique imaging? The reason I ask is that the nuclei may (i.e. a guess on my part) show up clearly with oblique light.
Dead right gekko - I'm very interested in the oblique-lighting technique and may get time to cut a few of those 'moon-shaped' thingies today and go for a test-drive! I'll post my attempts as soon as I have tried it! :)
John B

SteveSteve
Posts: 62
Joined: Tue Jun 09, 2015 6:21 pm

Re: Further Sectioning - A VERY Surprising 'happy accident'

#21 Post by SteveSteve » Wed Jun 17, 2015 8:06 am

Hi John,
I've had a go at combining 3 stains for tissue-differentiation using one of the hand-cut sections from the razor-blade series. It went pretty well, using Fast Green, Crystal Violet and Safranin I've got some pretty good results. My staining is improving slowly....
The section, being hand-c
Any chance that you can you run through your prep and staining protocols?

I am looking to get some differential staining of plant vascular tissue.

Cheers
Steve

billbillt
Posts: 2895
Joined: Mon Nov 10, 2014 10:01 pm

Re: Further Sectioning - A VERY Surprising 'happy accident'

#22 Post by billbillt » Wed Jun 17, 2015 3:08 pm

All I can say with my limited experience is that the photos you have presented here are no less than the highest professional quality..

SteveSteve
Posts: 62
Joined: Tue Jun 09, 2015 6:21 pm

Re: Further Sectioning - A VERY Surprising 'happy accident'

#23 Post by SteveSteve » Wed Jun 17, 2015 4:14 pm

Hi John,

Likewise very impressed.

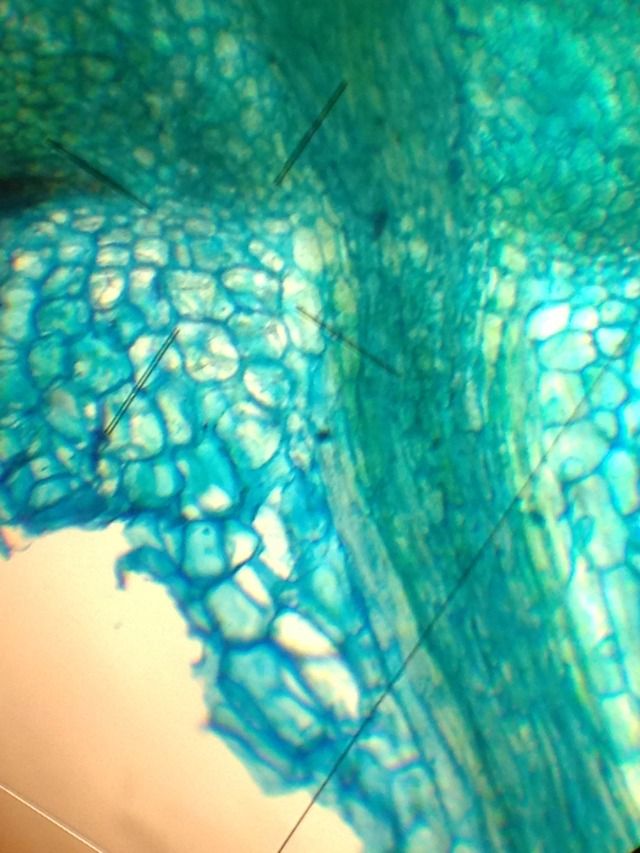
i haven't tried multi-stains yet. Here is the proximal part of a root with Methylene Blue.

Image

I'd really like to separate out the different tissues there!

Cheers
Steve

SteveSteve
Posts: 62
Joined: Tue Jun 09, 2015 6:21 pm

Re: Further Sectioning - A VERY Surprising 'happy accident'

#24 Post by SteveSteve » Wed Jun 17, 2015 4:19 pm

Oh and I should have said that was down the eyepiece of my old Lomo and low power (x60?) with the iPhone held up and trying to keep it steady!

Looking forward to some 'Plan' objectives soon ;-)

Cheers
Steve

User avatar
mrsonchus
Posts: 4175
Joined: Tue Feb 03, 2015 9:42 pm
Location: Cumbria, UK

Re: Further Sectioning - A VERY Surprising 'happy accident'

#25 Post by mrsonchus » Wed Jun 17, 2015 9:47 pm

Hi, gekko & bill, that's a very encouraging thing to say, many thanks! :D I'm really pleased you're enjoying the pictures etc - I love sharing Botany - to me it's Christmas-day as soon as I see my darling Wife and step into our gardens each day! Great fun & pleasure - it's good to know others are enjoying the adventures... Thank you both very much for your kindness. :)
John B

User avatar
mrsonchus
Posts: 4175
Joined: Tue Feb 03, 2015 9:42 pm
Location: Cumbria, UK

Re: Further Sectioning - A VERY Surprising 'happy accident'

#26 Post by mrsonchus » Wed Jun 17, 2015 10:57 pm

SteveSteve wrote:Oh and I should have said that was down the eyepiece of my old Lomo and low power (x60?) with the iPhone held up and trying to keep it steady!

Looking forward to some 'Plan' objectives soon ;-)

Cheers
Steve
Hi Steve - good to meet you. :) Sorry I've taken a good while to respond - I've had a very busy day today and right now am feeling a tad weary. Your picture looks pretty good to me, I started with the most awful old 'phone-camera but still got lots of pleasure simply because I'd actually got an image :oops: ... Your picture looks very nice to me, and detailed too.

Regarding multi-staining, I can say for certain. based on my recent experiences, that staining is most definitely as much an art as it is an algorithm! :D Basically, I started with single stains, such as Methylene-blue, a particular favourite of mine and simply practiced the art (some may say it's a dark-art :) ).
aside:Walter Dioni's articles in the magazine taught me a huge amount about basic tissue processing, including staining - you'd be very wise to work through them - they use onion-epidermis - no sectioning needed! end aside

My preparation is the full histological-process, as seen in some of my earlier posts, the staining is a matter of understanding what stains are and what they do, together with the various 'groups' of stains - e.g. 'basic', 'acid', 'additive', 'regressive'......etc.

If you would like to master staining I'm afraid you're in for a long and steep learning-curve - I tried simply replicating 'instructions' in various extremely good books - including Ruzin's fantastic book (do yourself a huge favour and get this book).

Stains need to be applied to a tissue in an environment (i.e. chemical) in which the stain can work, stabilize and persist - and of course be controlled during it's application - 'carpet-bombing' stains is almost always sub-optimal, although it will give a result and increase in contrast - the holy-grail of light microscopy!

When I'm studying the details of a staining-protocol for my chosen tissue, e.g. a Daffodil's flower-stem (pedicel) in XS, I start from the condition of the section being in a de-waxed state and secured to a slide - by drying, probably with subbing too, in what I would describe as a dessicated & essentially 'mummified' condition. :)

For close study - mix yourself a 'working solution' or 'stock solution' of your stain (in this case your methylene blue in water) and have it ready in a dropper-bottle of about 30-50ml. Don't have the stain so strong that it's opaque! One of my posts has a section referring to methylene blue with a picture of my working solution showing how it should actually look in terms of it's colour and therefore strength...

I add some stain to swamp the sample fully with stain and start timing, say initially for 1 minute, then remove excess stain with a (in this case water) gently & careful rinse - 'pull' the rinse through the section with the rinse on one side and a tissue on the other to 'suck-up' the water and therefore cause it to move through the section.

Examine your section and 'see how it looks' compared to your desired result. Over-staining will 'carpet-bomb' the sample and everything will be stained heavily, masking detail at the very least - yuk! :). If it's way too dark, dense and opaque - add more rinse (solvent for the stain being used - for methylene blue it's water) to remove more stain. If it's too vague or barely visible - add more staining solution. Iteration is the way to go, coupled of course with very careful observations as you go. You need a stain-strength that gives you a reasonable staining duration - it's far easier to measure & alter 30s-40s-1min-5min durations than try to control say 2s-4s-10s etc - this way lies madness! Also of course the error-tolerance will increase as timing inaccuracy will be a less significant proportion of the target time. Nobody ever times this perfectly - it's just not possible in the home setup. :)

Repeat with another additional stain, e.g 'Fast Green' (mine is in a 'cellosolve' mixture and therefore needs an alcohol-environment) etc - stain -> assess -> adjust -> assess -> .....

Good luck - start with methylene blue on it's own and practice the control of it's effect - without the ability to adjust how much and what the stains effect you can't progress - it's vital. It's not possible to simply 'add stain A', 'add stain B'..... the protocol is different for every tissue-type and every desired effect, every preparation technique used for the tissue.
Practice - you absolutely must be able to control your stain to get good results - I've practiced for hours just to get my first results to be anywhere close to looking good! :) Take notes of everything - if you don't you'll replicate an awful lot of effort.

I hope it goes well, judging by your nice image above you'll soon get the hang of it without doubt! :) Keep us posted.
John B

SteveSteve
Posts: 62
Joined: Tue Jun 09, 2015 6:21 pm

Re: Further Sectioning - A VERY Surprising 'happy accident'

#27 Post by SteveSteve » Thu Jun 18, 2015 4:22 am

Thanks John!

User avatar
mrsonchus
Posts: 4175
Joined: Tue Feb 03, 2015 9:42 pm
Location: Cumbria, UK

Re: Further Sectioning - A VERY Surprising 'happy accident'

#28 Post by mrsonchus » Thu Jun 18, 2015 11:42 am

SteveSteve wrote:Thanks John!
Hi Steve - you're very welcome for any input I can give you. I'm interested in your root picture, what type of plant is it from, what part of the root is it of and what type of root is it - fibrous, tap, adventitious... I'd love to know more . Are you able to share any more pictures of the plant at either the macro or micro level - both would be superb! :)

Tell us more of what you're doing. :)
John B

SteveSteve
Posts: 62
Joined: Tue Jun 09, 2015 6:21 pm

Re: Further Sectioning - A VERY Surprising 'happy accident'

#29 Post by SteveSteve » Sat Jun 20, 2015 8:33 am

Hi John,

Sorry I was not ignoring you. I had just typed another reply on the forum on Thurs evening when my wife's profile on her laptop corrupted. A 'quick' backup of 151,000 files which finished at midnight and I was too tired to go back online.

I am doing some research on a group of plants and am looking at adventitious roots at the moment. I don't want to say too much about the species involved as my progress is slow and I would like to publish the results when I have done sufficient work.

I have looked on the Brunel website and they have Fast Green and Safranin. I have a £30 wish-list to order today ;-)

I had a look at Amazon for Ruzin's book... mmm another £30-40. I will have a look in the UCL library next week and see if there is a copy there. Failing that it's back down the back of the sofa for more pennies! I will also look for Walter's articles.

I have spent so much time looking at fossils through the microscope that live biological material is a new adventure for me!
Cheers
Steve

User avatar
mrsonchus
Posts: 4175
Joined: Tue Feb 03, 2015 9:42 pm
Location: Cumbria, UK

Re: Further Sectioning - A VERY Surprising 'happy accident'

#30 Post by mrsonchus » Sat Jun 20, 2015 10:25 am

SteveSteve wrote:Hi John,

Sorry I was not ignoring you. I had just typed another reply on the forum on Thurs evening when my wife's profile on her laptop corrupted. A 'quick' backup of 151,000 files which finished at midnight and I was too tired to go back online.

I am doing some research on a group of plants and am looking at adventitious roots at the moment. I don't want to say too much about the species involved as my progress is slow and I would like to publish the results when I have done sufficient work.

I have looked on the Brunel website and they have Fast Green and Safranin. I have a £30 wish-list to order today ;-)

I had a look at Amazon for Ruzin's book... mmm another £30-40. I will have a look in the UCL library next week and see if there is a copy there. Failing that it's back down the back of the sofa for more pennies! I will also look for Walter's articles.

I have spent so much time looking at fossils through the microscope that live biological material is a new adventure for me!
Cheers
Steve
Hi again Steve - sounds fascinating - I know what you mean, it's pretty pointless presenting material before your results & conclusions are able to be tested and recreated by your audience/peers - that's the standard scientific process.

Brunel are in my considerable experience excellent - I bought both 'scopes from them and always go first to them for any supplies. They are simply superb - the ladies that will take your order by 'phone are knowledgeable about the products and very experienced and helpful, the sales director Helen is an huge help and is very helpful and knowledgeable. They are a very good company - totally reliable and competent. Their online ordering is perfectly efficient and in no way inferior to their telephone-ordering process. I've no connection with them other that as a very satisfied customer indeed!

I know the book's a touch pricey, but boy what a resource it is.. Remember the point about the staining-environments e.g. alcoholic, aqueous etc - it's important. Also - with a delicate tissue such as a root I'd suggest that you move between environment in graded series - you risk 'upsetting' your specimens if you don't. Just watch what happens when you move a piece of root from water to OH directly - all h..l breaks loose! :D

p.s. (the late) Walter D is a hero of mine - his work taught me an awful lot of basic processing - if you ever get a spare £10 buy his little book - the money will surely help his family - he was a 'proper' scientist working from home!

Keep up the good work Steve - keep in touch and read as many articles as you can from this forum and magazine - you will definitely learn a lot that will surely hasten and facilitate your progress.

Regards and good luck.
Last edited by mrsonchus on Fri Aug 21, 2015 1:07 am, edited 1 time in total.
John B

Post Reply