Page 1 of 1
Clip-around diffuser
Posted: Sun Aug 21, 2022 9:01 pm
by Chas
For diffuse light.
Cut the top and the bottom off a table-tennis ball
Glue half a coffee stirrer to each side
Cut the ball vertically on the opposite side to the stirrers
Shorten the coffee stirrers so that it doesnt tip over
Shorten them more to get it to open around a fatter objective
At rest / Closed:

- Ping pong 1 closed.jpg (57.28 KiB) Viewed 3053 times
Openned:

- Ping pong 2 open.jpg (61.09 KiB) Viewed 3053 times
Around an objective:

- Ping pong 4 around objective.jpg (60.86 KiB) Viewed 3053 times
It maybe gives too diffuse a light for some kind of things
Re: Clip-around diffuser
Posted: Sun Aug 21, 2022 10:20 pm
by Greg Howald
Ok. I see what you did and how to use it. Did you do it for something specific and what prompted you to need it?
Re: Clip-around diffuser
Posted: Sun Aug 21, 2022 10:57 pm
by Scarodactyl
That's a clever design! Looks really easy to handle. I think I might try one myself.
Re: Clip-around diffuser
Posted: Mon Aug 22, 2022 2:03 pm
by Chas
Sacrodactyl, it is the result of an accident

At the moment it opens 2cm [just] with the stirrers ~7cm long and set parallel to each other.
It might open wider, more easily, if the arms are diverging when they are glued on.
Re: Clip-around diffuser
Posted: Mon Aug 22, 2022 7:28 pm
by Chas
Greg, it is really for when you are trying to look at / photograph whole items (rather than sections) using 'top lighting' rather than the transmitted lighting from a condenser.
Very often insects and leaves have surfaces or parts/ bristles that are very reflecting and the reflection from these dazzle so much that other things are harder to see.
A ping pong ball put around the objective turns what was a bright sunny day into an overcast one.
However trying to postion a ball, or parts of one, around an objective can be quite a tricky thing ..especially if you are a bit clumsy, like me.
Here is an illustration of the effect of diffusing the light:
-undiffused on the left
-diffused on the right

- diffused comparison small.jpg (71.85 KiB) Viewed 2942 times
Re: Clip-around diffuser
Posted: Mon Aug 22, 2022 7:46 pm
by imkap
Great illustration, thanks for this...
Re: Clip-around diffuser
Posted: Fri Sep 02, 2022 11:53 am
by GerryR
I wouldn't have expected that much of a difference! That is excellent. Definitely worth having one on hand. "Necessity, the mother of invention." Thanks for the details on how it is made.
Re: Clip-around diffuser
Posted: Fri Sep 02, 2022 1:39 pm
by Greg Howald
Thanks! Now I understand. I have the ping pong balls and will make a couple of these things, but you make me think that a bigger thing made with similar materials might enhance imaging with the stereo scope as well .
Re: Clip-around diffuser
Posted: Thu Sep 08, 2022 9:21 am
by Chas
I wouldn't have expected that much of a difference!
... I must admit it does seem a bit extreme, but it is probably partly down to lights that I was trying to use (old goose-neck single-LED things from Ikea) as well as the beetles colouring and shiny surface.
I have since tried a 2" square diffused LED panel-light on it ( a small video light) and the side of the beetle facing the panel light was quite reasonable looking.
The diffuser / ball doesnt have to be as complex as my clip around thing. In fact having a completely surrounding ball means that you can't hold something under the objective (stuck on a needle /stick) held from the side.
Just a part of a ball can therfore be handy, something like this:

- two thirds ping pong ball.jpg (56.83 KiB) Viewed 2516 times
E.g.
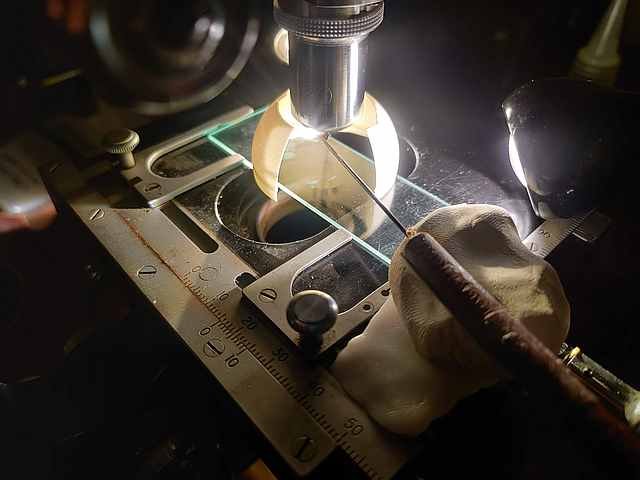
- Table tennis ball as diffuser.jpg (40.62 KiB) Viewed 2434 times
This was the diffused setup for the beetle in the 'illustration' photos.
Notice that there is just a short objective on the microscope, which makes it easier to lower the objective into the top of the ball.