SMZ-10 OPTICAL AXIS COLLIMATOR

Everything relating to microscopy hardware: Objectives, eyepieces, lamps and more.
Post Reply
Message
Author
stjepo
Posts: 340
Joined: Wed May 23, 2018 10:25 am

SMZ-10 OPTICAL AXIS COLLIMATOR

#1 Post by stjepo » Tue Nov 14, 2023 9:11 am

With patience and a lot of time I have restored a Nikon SMZ-10. I have polished one of the lenses that were scratched, cleaned the mould on the lenses and restored the lever that changes from BINOCULAR to RIGHT or LEFT STEREO PHOTO.

It was in a useless state.

Although it looked very good, using it I noticed that my eyesight did not adjust to the device not as easily as it does using the SMZ-1 and SMZ-2 models that I also have repaired.
I consulted the SMZ-10 repair manual to see how I could collimate it.

The text says:
01.jpg
01.jpg (75.99 KiB) Viewed 22305 times
Since I do not have the PARALLEL STEREO TOOL J25116 tool or the PARALLEL COLLIMATORS (A) tool I have no way of follow the manual instructions.

As an alternative, it occurred to me that I could use a laser beam to collimate the SMZ-10 through each one of the eyepiece sleeves .

I have tried it on both in a SMZ-1 and in a SMZ-2 (which I assume are correctly aligned) and I want to do it on the SMZ-10 but I don't know what criteria to follow to adjust the prisms (upper part) where I think the problem lays in.

Before doing so, I have decided to ask you if anyone can give me any ideas if using a laser beam will be useful to collimate this binocular microscope or there is a better way.

The images show how I will use this laser beam. I will measure the distances of the light obtained in the right and in the left , although this does not assure me that the distance is parallel within each other.

Thanks in advance to any help I can get (Maybe is a silly idea).

Steve
Attachments
04.jpg
04.jpg (63.47 KiB) Viewed 22305 times
03.jpg
03.jpg (55.68 KiB) Viewed 22305 times
02.jpg
02.jpg (57.51 KiB) Viewed 22305 times

PeteM
Posts: 3014
Joined: Tue Dec 06, 2016 6:22 am
Location: N. California

Re: SMZ-10 OPTICAL AXIS COLLIMATOR

#2 Post by PeteM » Tue Nov 14, 2023 5:29 pm

Stjepo,

I'd think your approach could work if the beam is tightly collimated, concentric with the sleeve, and the sleeve is a close fit to the eyetube. You might mark it and insert it at the exact same compass point in both eyetubes, so any concentricity or out-of-parallel issues are at least consistent.

Another approach, which you may already have tried, is to view a target that gives you a reference to the center and edges of the field of view. Once you see the same thing through both eyepieces and at different zoom levels, the scope is pretty much collimated (as far as my own lying eyes are concerned :-) )

Without much knowledge, patience, OEM data or tools, I hate trying to restore stereo microscopes to perfection. The SMZ-10 would be worth it, though. Do you happen to have a PDF copy of the manual? It could be useful to many of us.

In order of what I've found easiest to hardest:

- Most stereo scopes have a bit of adjustment to center the eyetubes. Yours has a very small bit of movement from centering screws on the eyetubes. Hopefully, that little bit will fix things. Others have screws holding the eyetubes and those have a bit of movement - and can even be opened up. Your SMZ-10 might have that under the covers?

- Most good scopes have upper prisms that are mechanically adjusted and then secured with a drop of adhesive. You can sometimes see where one has jarred loose -- and it is the likely culprit. Even if not, the prism adjustments are often pretty accessible in the top portion. You'd remove the covers, put back the eyetubes, and center the target vertically and horzontally using whatever prism or mirror adjustments are available.

- It gets harder moving down into the zoom mechanism.

- Pafocality problems with zoom mechanisms (different magnifications and field sizes in each eye) are often due to the mechanism sticking on a rod or carrier. That doesn't seem to be your case, but might be worth a check. Cleaning and lube usually fix things if the scope hasn't been dropped. I had to replace a spring in one case and a roller bearing in another.

- It will be hard to know if you removed multiple lenses for cleaning or polishing, which ones might be out of adjustment, Hopefully, the manual you have has some detailed step-by-step approach you can use with either your laser collimator idea or just viewing a target.

Good luck. It's a cool scope.

stjepo
Posts: 340
Joined: Wed May 23, 2018 10:25 am

Re: SMZ-10 OPTICAL AXIS COLLIMATOR

#3 Post by stjepo » Wed Nov 15, 2023 9:58 am

PeteM wrote:
Tue Nov 14, 2023 5:29 pm
Stjepo,

I'd think your approach could work if the beam is tightly collimated, concentric with the sleeve, and the sleeve is a close fit to the eyetube. You might mark it and insert it at the exact same compass point in both eyetubes, so any concentricity or out-of-parallel issues are at least consistent.

Another approach, which you may already have tried, is to view a target that gives you a reference to the center and edges of the field of view. Once you see the same thing through both eyepieces and at different zoom levels, the scope is pretty much collimated (as far as my own lying eyes are concerned :-) )

Without much knowledge, patience, OEM data or tools, I hate trying to restore stereo microscopes to perfection. The SMZ-10 would be worth it, though. Do you happen to have a PDF copy of the manual? It could be useful to many of us.

Thank you PeteM, as always, you are a very inspiring and helpful person.

Following your recommendations I worked with the SMZ-10 lower part making sure that the laser was perfectly collimated (I rotated the laser and it always points to the same place), the setting can be seen in the accompanying images.
05.jpg
05.jpg (69.51 KiB) Viewed 22208 times


The graph paper was placed parallel to the middle body of the SMZ-10 and the device was centered on a virtual line as shown in the photo.
06.jpg
06.jpg (68.24 KiB) Viewed 22208 times
I have been able to differentiate the aura of the light both at its maximum magnification as in the minimum.
07.jpg
07.jpg (91.24 KiB) Viewed 22208 times


The result tells me that the problem is not there but at the top and I will follow your advice to see if any of the screws with glue have come loose. To be continued!!!

Steve

stjepo
Posts: 340
Joined: Wed May 23, 2018 10:25 am

Re: SMZ-10 OPTICAL AXIS COLLIMATOR

#4 Post by stjepo » Wed Nov 15, 2023 10:09 am

"Do you happen to have a PDF copy of the manual? It could be useful to many of us."


The link:

https://www.manualslib.com/manual/96945 ... mz-10.html


How can I upload the file? Too large.

Steve

stjepo
Posts: 340
Joined: Wed May 23, 2018 10:25 am

Re: SMZ-10 OPTICAL AXIS COLLIMATOR

#5 Post by stjepo » Wed Nov 15, 2023 7:13 pm

The image on the right and left appear to be parallel but separated from each other, which produces double vision. I have no idea how to fix it.

The repair manual relies heavily on special tools. :cry:

PeteM
Posts: 3014
Joined: Tue Dec 06, 2016 6:22 am
Location: N. California

Re: SMZ-10 OPTICAL AXIS COLLIMATOR

#6 Post by PeteM » Wed Nov 15, 2023 9:02 pm

Stjepo, Thanks for the link - that should be all that anyone needs to download it.

Did you remove and then replace any lenses in the lower assembly for cleaning? If not, I'd try either the laser or target methods by insertion in the microscope head and see what difference you get (and if you can adjust the top tubes to fix it).

Ideally, a former Nikon tech will see this thread and describe what commonly goes out of alignment and how to fix it.

stjepo
Posts: 340
Joined: Wed May 23, 2018 10:25 am

Re: SMZ-10 OPTICAL AXIS COLLIMATOR

#7 Post by stjepo » Wed Nov 15, 2023 9:55 pm

I polished the lenses that were scratched . You can see it sin this link

viewtopic.php?f=5&t=17786


Stjepo

PeteM
Posts: 3014
Joined: Tue Dec 06, 2016 6:22 am
Location: N. California

Re: SMZ-10 OPTICAL AXIS COLLIMATOR

#8 Post by PeteM » Wed Nov 15, 2023 10:41 pm

In my limited experience, the most common alignment failures are in the head. It's what gets handled, knocked hardest when tipped, and so on. However, at this point, it could also be that the bottom two lenses (or elsewhere) in the zoom train are off a bit. Still, these are expected to have a parallel path, so your current test doesn't mean they're bad. Can I assume you ran the test with the bottom common mode objective in place?

If you can find a fellow microscopist with a Nikon CMO scope that will accept your head, you might first check just your head for alignment. The SMZ10, SMZ800, and SMZ-U should all fit your head.

If it's good, testing with a target as described earlier, you can concentrate on the bottom unit. You also have a valuable head that could fit several other Nikon scopes and offer the unique either-side trinocular operation. That gets you halfway to a replacement scope if needed.

If it's bad, you can try the adjustments to the head mentioned earlier. Inspect inside to see if any prisms have moved and what adjustments are possible. Unless one of the prisms has obviously moved, try adjusting the tubes to get a converged image. If that isn't enough, try adjusting the prisms. Ideally, you now have a converged image, that stays parfocal and the same magnification throughout the zoom. If the magnification changes, it's a zoom unit problem.

If your head is good, you can try adjusting (if possible) the bottom two lenses that were cleaned - using your laser through the eyepieces or a target. If that doesn't work, and there isn't someplace where the zoom section is hanging up or a lens has clearly been disturbed, I'd be inclined to keep the CMO objective but move on to another scope.

A possibly useful link: http://www.microscopy-uk.org.uk/mag/art ... ollim.html

Others may have better or further advice. Good luck!

stjepo
Posts: 340
Joined: Wed May 23, 2018 10:25 am

Re: SMZ-10 OPTICAL AXIS COLLIMATOR

#9 Post by stjepo » Mon Nov 20, 2023 7:37 pm

PeteN Possibly my problem is with the lenses of this part of the smz...
13.jpg
13.jpg (39.67 KiB) Viewed 22032 times

..these are in the wrong order and in the opposite direction to what they should be.
12.jpg
12.jpg (115.46 KiB) Viewed 22032 times

Do you have any idea how these should go correctly?

Thank you

PeteM
Posts: 3014
Joined: Tue Dec 06, 2016 6:22 am
Location: N. California

Re: SMZ-10 OPTICAL AXIS COLLIMATOR

#10 Post by PeteM » Mon Nov 20, 2023 8:19 pm

Sorry to say, I no longer have an SMZ-10 and don't know.

This particular objective is known to have "doming" at low magnifications even when properly assembled. So, others have tried using different stereo objectives -- often to good effect. Sometimes these are inexpensive. As an example, I've been using a 250mm surgical microscope objective with an m60 x 1mm thread to good effect as a .4x objective on a Wild M8 -- and just bought another for around $70 to adapt to another scope. Around 100mm focal length might be ideal if you wanted something closer to 1x.

I've even used a Kodak slide projector lens on a Wild M3 as a goof - and found it usable if not desirable.

Scarodactyl
Posts: 2794
Joined: Sat Mar 03, 2018 9:09 pm

Re: SMZ-10 OPTICAL AXIS COLLIMATOR

#11 Post by Scarodactyl » Mon Nov 20, 2023 11:28 pm

Yeah, this lens can be improved on by replacing with a more recent equivalent. Really the special part of the smz-10 is the head, if that's in good shape putting it on a newer smz series body or one of the Chinese clones would be an improvement.

stjepo
Posts: 340
Joined: Wed May 23, 2018 10:25 am

Re: SMZ-10 OPTICAL AXIS COLLIMATOR

#12 Post by stjepo » Wed Dec 06, 2023 11:23 am

I managed to get the PRIMARY OBJECTIVE lenses in order thanks to IGOR Cononenco https://www.youtube.com/@Conoptical/community.

Igor had a similar device that he dismantled to help me. In gratitude I have made a chart with the correct order in his name to help anyone who may have the same problem in the future.
Orden ñlentes.jpg
Orden ñlentes.jpg (64.93 KiB) Viewed 21619 times
I still have the problem of collimating my SMZ-10. The vision of the left eye and the right eye intersect and remain separated from each other. At 4X magnification, focusing the image correctly with the right eye the image I can see is at the left while the image of the left eye is on the right. It is focused at a working distance of 10 cm.
In the case of the 0.65X magnification the same thing happens but the working distance is at 13 cm.

I don't want to touch any of the prisms that are in place and well attached. I suspect the problem is with the zoom tube, but I don't know how I can fix it.

Comparing it with my SMZ-1 (it is correctly collimated) using my homemade laser technique I see that when it is at 3X and I get a perfect vision of the object the laser light of the right and the left hits the same point at a 9 cm working distance and when it is at 0,7X the laser light of the right and the left hits the same point (slightly separated) at a working distance of 9.5 cm.


I hope that a NIkon technician will help me find a solution and help others with the same problem.

Regards

Scarodactyl
Posts: 2794
Joined: Sat Mar 03, 2018 9:09 pm

Re: SMZ-10 OPTICAL AXIS COLLIMATOR

#13 Post by Scarodactyl » Wed Dec 06, 2023 5:18 pm

The problem is usually in the head, not the zoom body, even if nothing is loose. Not 100% of the time but usually. You'd need to mix and match with known good components to isolate the issue. It's never an easy fix, usually not really possible without factory tools unfortunately.

stjepo
Posts: 340
Joined: Wed May 23, 2018 10:25 am

Re: SMZ-10 OPTICAL AXIS COLLIMATOR

#14 Post by stjepo » Wed Dec 06, 2023 7:42 pm

Scarodactyl wrote:
Wed Dec 06, 2023 5:18 pm
The problem is usually in the head, not the zoom body, even if nothing is loose. Not 100% of the time but usually. You'd need to mix and match with known good components to isolate the issue. It's never an easy fix, usually not really possible without factory tools unfortunately.
You are probably right in most cases but in this case I think the problem is with the zoom.

I attach images of just the head of the SMZ-10 with the laser light through each of the eyepieces. It can be observed from the left eyepiece the light falls directly to the left side without deviating and from the right eyepiece the light falls directly to the right side without deviating.
CENTRADO copia.jpg
CENTRADO copia.jpg (71.72 KiB) Viewed 21537 times
If we do the same with the bottom part at either 4X or 0.66X magnification, we can see that the light on the left side deviates to the right side and the light on the right side deviates to the left side, which would be correct if Both lights coincide in the center which they do not.
4X.jpg
4X.jpg (71.01 KiB) Viewed 21537 times
066X.jpg
066X.jpg (78.48 KiB) Viewed 21537 times

stjepo
Posts: 340
Joined: Wed May 23, 2018 10:25 am

Re: SMZ-10 OPTICAL AXIS COLLIMATOR

#15 Post by stjepo » Thu Dec 07, 2023 9:50 am

My system was only to determine where the problem was.It looks like it's in the zoom area.
This gives me hope because I wouldn't know what to do at the head of the microscope where the prisms are.
I have managed to centre the 4X. I am using the manual.
The SMZ-10 repair manual helps but it is difficult to understand (at least for me) and they always resort to special tools.

stjepo
Posts: 340
Joined: Wed May 23, 2018 10:25 am

Re: SMZ-10 OPTICAL AXIS COLLIMATOR

#16 Post by stjepo » Sun Dec 10, 2023 8:25 pm

Thank you very much to everyone who gave me advice, I have achieved it, now it looks perfectly and the zoom works well. My problem was with the lenses, which when they sold it to me, at a very good price, were installed incorrectly. The head was in perfect condition.

Regards.

Scarodactyl
Posts: 2794
Joined: Sat Mar 03, 2018 9:09 pm

Re: SMZ-10 OPTICAL AXIS COLLIMATOR

#17 Post by Scarodactyl » Sun Dec 10, 2023 8:31 pm

Could you elabroate a bit on that? I'm very happy you got it to work!

stjepo
Posts: 340
Joined: Wed May 23, 2018 10:25 am

Re: SMZ-10 OPTICAL AXIS COLLIMATOR

#18 Post by stjepo » Mon Dec 11, 2023 1:32 pm

You are right Scarodactyl could help others in a similar situation.

This is just a small guide of what I did to fix my SMZ-10. Keep in mind that I am not an expert in fixing Stereo Microscopes and I am only trying to summarize the method I used. In this summary I must warn that I assembled and disassembled the SMZ-10 hundreds of times, that is, I used the old "Trial and error system" like all those who have no idea what they are doing. I admit that it helped me a lot to understand how the device worked and how it had been designed. I hope this helps someone to avoid having to spend hours doing the same thing. It will only work for those who have a similar problem.


Since I didn't have the appropriate tools specified in the NIKON STEREOSCOPIC MICROSCOPE SMZ-10 REPAIR MANUAL the "tools" I used were:

a) The Repair Manual (MR SMZ-10) (in the network)
b) The Instruction Manual (MI SMZ-10) (in the network)
c) A laser beam with an adapter with the diameter of the eyepieces,
mh03.jpg
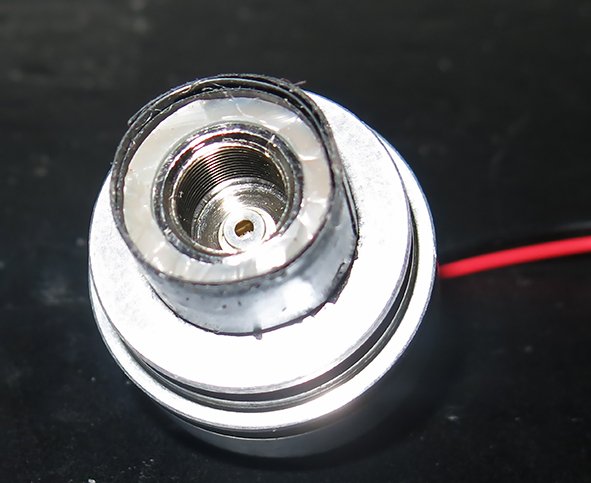
mh03.jpg (59.62 KiB) Viewed 20736 times
d) A tool for the lens cell adjustment ring (28), figure (56) page (35) of the (MR SMZ-10),
e) A tool for the lens ring (29), figure (56) page (35) of the (MR SMZ-10),
mh01.jpg
mh01.jpg (96.33 KiB) Viewed 20736 times
f) Xylenol to take off the glue,
g) Glue.

Sequence that I recommend following, unless expert technicians say otherwise:

a) Define what the failure is: In my case was very complicated (for me); adjusting the view to a 4X magnification at a working distance of 9 cm the image on the left side was very separated from the image on the right side producing a double image. Al the same working distance but 0.66X magnification I couldn't see any image whatsoever and only was possible to get it at 15cm working distance, again the left and right images completely separated producing a double image..
b) The SMZ-10 has two parts that can be separated so it was important to know which of the two had to be fixed.
c) Using the laser beam and some semicircles printed in a paper placed at the base help me to determine the virtual center of the image (I used a SMZ-1 perfectly collimated and the laser beam).
mh04.jpg
mh04.jpg (51.56 KiB) Viewed 20736 times
d) I place the laser beam through the eyepiece with the SMZ-10 complete body, the light beam came out very deviated, the left to the right and right to the left far away from the virtual center. (See message #14 of this same topic)
e) Then, I used the laser beam only with the upper part of the SMZ-10, the light came out perpendicular without any deviation and at an equal distance from the virtual center, both the right and the left beam (See message #14 of this same topic).
f) Next, I placed the laser beam only at the bottom part (ZOOM) it confirmed that the pronounced deviation of the laser beam was only in this part (See message #14 of this same topic). For me it was a relief to know that it was the zoom part the one to repaired and not the top part (I have no clue in how to adjust prisms nor the right tools to do so).
g) To repair the zoom part, the pages (31) to (36) of the (MR SMZ-10) were of great help (it was a bit difficult for me to understand it, not because of the language, but because of the way the different operations described and especially the references to the different figures. (To make it easier I gather all the images that interested me, on a single page, it helped a lot)
mh02.jpg
mh02.jpg (157.61 KiB) Viewed 20736 times
h) In my case I discovered, after turning them over and over many times, that the lenses had been manipulated and placed incorrectly as it had happened already with the lens cell described in figure (39) on page (27) of the (MR SMZ- 10) also described in figure (4) on page (9) of the (MI SMZ-10) (See also message #12 of this same topic).
i) I was able to assemble the rest of the lenses correctly thanks to figure (52) on page (31) of the (MR SMZ-10). To help with a better understanding I have made a small design of how the lens sandwich are installed in each of its receptacles.
mh05.jpg
mh05.jpg (84.97 KiB) Viewed 20736 times

stjepo
Posts: 340
Joined: Wed May 23, 2018 10:25 am

Re: SMZ-10 OPTICAL AXIS COLLIMATOR

#19 Post by stjepo » Mon Dec 11, 2023 1:44 pm

j) Next, I adjusted the focus of each of the eyepieces by twirling the gold lenses receptacles using the old "Trial and error system" with the help of only one of my eyes. Previously I had adjusted the diopter ring as shown on page (20) of the (MR SMZ-10).
mh06.jpg
mh06.jpg (71.95 KiB) Viewed 20733 times
mh07.jpg
mh07.jpg (34.7 KiB) Viewed 20733 times
k) Then, and using again the old "Trial and error system", I adjusted the optical axis of both eyepieces for them to showed one image. To do that both lens cells (34) described in figure (56) on page (35) must be moved as far away as posible in the opposite direction with the help of the 4 screws (91b) in figure (56) on the page (35) (Here a little patience is required to twiddled with it)
mh08.jpg
mh08.jpg (85.37 KiB) Viewed 20733 times
l) It is likely that small readjustments will be needed in the end but these procedures helped me repair the my SMZ-10.

I hope this helps, if you don't understand any of the parts, tell me so for me to clarify it the best I can.

Any criticism or better repair system for the SMZ-10 is welcome.

stjepo
Posts: 340
Joined: Wed May 23, 2018 10:25 am

Re: SMZ-10 OPTICAL AXIS COLLIMATOR

#20 Post by stjepo » Tue Dec 12, 2023 8:13 pm

It's ok for you Scarodactyl?


Regards

Scarodactyl
Posts: 2794
Joined: Sat Mar 03, 2018 9:09 pm

Re: SMZ-10 OPTICAL AXIS COLLIMATOR

#21 Post by Scarodactyl » Tue Dec 12, 2023 10:38 pm

It's fascinating, though I was a bit confused by H. Had aome of the lenses been cleaned and then put back in backwards?
Should be very helpful for anyone else taking the same path in the future.

stjepo
Posts: 340
Joined: Wed May 23, 2018 10:25 am

Re: SMZ-10 OPTICAL AXIS COLLIMATOR

#22 Post by stjepo » Wed Dec 13, 2023 11:09 am

Yes, when it came into my hands this stereoscopic microscope had been discarded as useless; I had two problems. A completely scratched lens and it was decollimated.

It cost me very little to buy it but a lot of time to repair it.

I polished the lens because I couldn't find a replacement and it turned out perfect, but I didn't understand what the real problem was that created a double image.

It took me a long time to realize that the problem was in the order of the lenses because I did not know how to interpret the drawing of the lenses that appears in the repair manual.

I'm just an amateur, I don't understand anything about optics. Probably someone before me tried to repair the device without much success.

Sure Squintsalot
Posts: 399
Joined: Mon May 16, 2022 3:44 pm

Re: SMZ-10 OPTICAL AXIS COLLIMATOR

#23 Post by Sure Squintsalot » Wed Dec 13, 2023 2:42 pm

stjepo wrote:
Tue Nov 14, 2023 9:11 am
With patience and a lot of time I have restored a Nikon SMZ-10. I have polished one of the lenses that were scratched, cleaned the mould on the lenses....
Not to hijack this awesome thread, but what product and procedure did you use to polish your lenses?

Thanks, in advance!

stjepo
Posts: 340
Joined: Wed May 23, 2018 10:25 am

Re: SMZ-10 OPTICAL AXIS COLLIMATOR

#24 Post by stjepo » Wed Dec 13, 2023 6:27 pm

Sure Squintsalot wrote:
Wed Dec 13, 2023 2:42 pm
stjepo wrote:
Tue Nov 14, 2023 9:11 am
With patience and a lot of time I have restored a Nikon SMZ-10. I have polished one of the lenses that were scratched, cleaned the mould on the lenses....
Not to hijack this awesome thread, but what product and procedure did you use to polish your lenses?

Thanks, in advance!

I gladly share my experiences especially if they can help others.

The lens were very scratched. Apparently someone tried to clean it with something very abrasive. Initially I thought it was fungus because it looked like a cloud. Since I couldn't find a replacement part and thinking I had little to lose, I followed my wife's advice. Why do you polish it? and I started looking for some product for fine polishing.
I bought this polishing paste on AliExpress but I had no hope that it would work.

The system was very simple:

a) I protected the opposite side of the lens, which was in perfect condition, with a piece of carpenter's tape. Failure to do so you run the risk of scratching the face that is in good condition.
b) I rested the lens on a piece of cloth that made a kind of cushion.
c) I put a little bit of the polishing paste on a piece of cotton and started polishing the lens in circles. You have to apply a little pressure and always make circles. Don't be scared because soon you will see that the lens will start to be much more scratched than before, but you will see that after turning the cotton around and around (and many many times, adding a little polishing paste from time to time) you will begin to notice that The lens will gradually lighten until it is perfectly polished, like new.

It requires a lot of patience because takes long time to polish it (if I'm not mistaken I spent more than 2 full hours polishing, I stopped to rest from time to time).
Two details must be taken into account:

1) The diameter of the lens that I polished was 2 cm and
2)It should not be done with lenses that have any type of coating.

I know some of you will think about using the Dremel, don't do it! because the heat from the high speed will cause the glass to heat up and break if the lens has not first flown away.
I have thought about how to mechanize this task although I have only tested it on the metal of some microscope objectives whose optics were perfect but their metallic exterior is very scratched due to the mistreatment received.

I got a Nikon camera motor that rotates slowly thanks to gears and has a very powerful torque. Now I'm trying to fit a speed reducer to reduce the spin using one from a broken waterpik OralB machine, but that's another story and I'm working on it.

I hope I've helped.

stjepo
Posts: 340
Joined: Wed May 23, 2018 10:25 am

Re: SMZ-10 OPTICAL AXIS COLLIMATOR

#25 Post by stjepo » Wed Dec 13, 2023 6:28 pm

Sure Squintsalot wrote:
Wed Dec 13, 2023 2:42 pm
stjepo wrote:
Tue Nov 14, 2023 9:11 am
With patience and a lot of time I have restored a Nikon SMZ-10. I have polished one of the lenses that were scratched, cleaned the mould on the lenses....
Not to hijack this awesome thread, but what product and procedure did you use to polish your lenses?

Thanks, in advance!

I gladly share my experiences especially if they can help others.

The lens were very scratched. Apparently someone tried to clean it with something very abrasive. Initially I thought it was fungus because it looked like a cloud. Since I couldn't find a replacement part and thinking I had little to lose, I followed my wife's advice. Why do you polish it? and I started looking for some product for fine polishing.
I bought this polishing paste on AliExpress but I had no hope that it would work.

The system was very simple:

a) I protected the opposite side of the lens, which was in perfect condition, with a piece of carpenter's tape. Failure to do so you run the risk of scratching the face that is in good condition.
b) I rested the lens on a piece of cloth that made a kind of cushion.
c) I put a little bit of the polishing paste on a piece of cotton and started polishing the lens in circles. You have to apply a little pressure and always make circles. Don't be scared because soon you will see that the lens will start to be much more scratched than before, but you will see that after turning the cotton around and around (and many many times, adding a little polishing paste from time to time) you will begin to notice that The lens will gradually lighten until it is perfectly polished, like new.

It requires a lot of patience because takes long time to polish it (if I'm not mistaken I spent more than 2 full hours polishing, I stopped to rest from time to time).
Two details must be taken into account:

1) The diameter of the lens that I polished was 2 cm and
2)It should not be done with lenses that have any type of coating.

I know some of you will think about using the Dremel, don't do it! because the heat from the high speed will cause the glass to heat up and break if the lens has not first flown away.
I have thought about how to mechanize this task although I have only tested it on the metal of some microscope objectives whose optics were perfect but their metallic exterior is very scratched due to the mistreatment received.

I got a Nikon camera motor that rotates slowly thanks to gears and has a very powerful torque. Now I'm trying to fit a speed reducer to reduce the spin using one from a broken waterpik OralB machine, but that's another story and I'm working on it.

I hope I've helped.

stjepo
Posts: 340
Joined: Wed May 23, 2018 10:25 am

Re: SMZ-10 OPTICAL AXIS COLLIMATOR

#26 Post by stjepo » Wed Dec 13, 2023 6:29 pm

For some reason I can no longer attach images.

stjepo
Posts: 340
Joined: Wed May 23, 2018 10:25 am

Re: SMZ-10 OPTICAL AXIS COLLIMATOR

#27 Post by stjepo » Wed Dec 13, 2023 6:37 pm

POLISHING PASTE BADAK:

DIAMOND PASTE

GRADE W 0.5

SOLUBLE OIL

Scarodactyl
Posts: 2794
Joined: Sat Mar 03, 2018 9:09 pm

Re: SMZ-10 OPTICAL AXIS COLLIMATOR

#28 Post by Scarodactyl » Wed Dec 13, 2023 6:56 pm

Well overall I'd say you'vd done something quite remarkable. Again thanks for all the detail, it was a fun read. I hope you enjoy the scope!

Post Reply