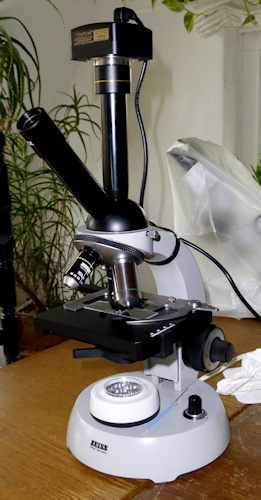
Since a few weeks I own a Zeiss KF2 (Junior) equipped with a Touptek 5,1 mp camera (see my introduction).
While I like the microscope, I was from beginning struggling with false colors and flickering in the camera. The ToupView software offers a lot of setting options. Auto Exposure and White Balance adjustment are hit or miss. A slight change in light or color may extremely change the hue. Flickering could only slightly be overcome by dimming the light.
Two advices helped occasionally but not reliably:
1. set white balance with no object.
2. anti-flicker, works only with auto exposure off, making correct exposure extremely difficult.
I had the feeling that the halogene lamp of the Junior (6V 5W) may be the culprit, so I experimented with various portable LED lamps I have. The following solution considerably improved the quality:
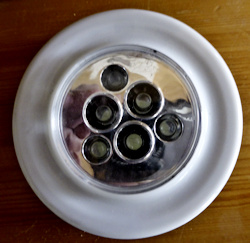
I had put a batterie driven LED nightlamp under the condenser:
the whole setup looking like this:
It gives a blueish hue in the ocular (probably matter of habit), which in the software can be overcome by white balance.
(A light yellow filter spoiled the hue.)
In the condenser the auxiliary lens has to be swung in, giving an evenly illuminated larger field, normally used only for low-power objectives. The apertures cannot be used as the LEDs show up and glare.
Any suggestions for a more professional solution are welcome.
Kind regards,
Hans