So after reading certain sites and making filters I would like to have new designs.
These are my current designs:
New filters
New filters
- Attachments
-
- image.jpg (165.28 KiB) Viewed 6783 times

Re: New filters
Hello,
a few recommendations:
1. Make the filters black and not reflective, it might otherwise damage the lamp of the microscope (halogen bulb overheats, if you use halogen).
2. When making oblique illumination filters, I found out that the effect is stronger if the cut out does not go all the way to the center of the filter. If the cut-out goes to the center, then there will be much direct light from the lamp, reducing the 3D appearance.
These filters were made by printing on overhead foil (necessary to place several over each other).
 Oliver Kim - http://www.microbehunter.com - Microscopes: Olympus CH40 - Olympus CH-A - Breukhoven BMS student microscope - Euromex stereo - uSCOPE MXII
Re: New filters
Thanks for the tips but I'm using an LED and I was just looking for some different designs in general
-
Jan l'Amie
- Posts: 15
- Joined: Mon Oct 13, 2014 7:17 am
- Location: The Netherlands
- Contact:
Re: New filters
I organized a Rheinberg and oblique-light filter making workshop at our club and I use transparant thin colourless Acryl foil for making the filters. With a special tool (in Dutch ,,holpijp,,) I make round pieces, fitting in the filterholder. Then I make pieces in different shapes of black and coloured transparant sticky foil and place that at the Acryl pieces. So I can create all kind of easy and cheap to make filters in all kind of shapes and color combinations. Works great.
- filters small.jpg (117.54 KiB) Viewed 6764 times
Re: New filters
Hi,Oliver,may I ask what's the material you used to make filters?Oliver wrote:Hello,
a few recommendations:
1. Make the filters black and not reflective, it might otherwise damage the lamp of the microscope (halogen bulb overheats, if you use halogen).
2. When making oblique illumination filters, I found out that the effect is stronger if the cut out does not go all the way to the center of the filter. If the cut-out goes to the center, then there will be much direct light from the lamp, reducing the 3D appearance.
These filters were made by printing on overhead foil (necessary to place several over each other).
Re: New filters
I used a color laser printer and printed the filters on heat-proof transparency foil (for laser printer). Transparency foil for ink jet printers ae probably not heat resistet enough. The filters do get hot when used. I have halogen light, so they will probably not get hot as much when using LED. i used double sided tape to glue several filters together, because the central part of the filter has to be sufficiently dark, otehrwise the Rheinberg effect is not very strong.Hi,Oliver,may I ask what's the material you used to make filters?
Oliver.
Oliver Kim - http://www.microbehunter.com - Microscopes: Olympus CH40 - Olympus CH-A - Breukhoven BMS student microscope - Euromex stereo - uSCOPE MXII-
microgreen
- Posts: 42
- Joined: Mon Oct 13, 2014 9:36 am
Arthur Strange's VAC 2 contrast method
Have you tried the Arthur Strange VAC 2 variable contrast method? - Probably not even heard of him?
Arthur Strange published his method in the 1980's
The stops are made from polarising material.
1/ A disc ,the diam of your filter holder is cut and a quadrant is cut out.
2/ A smaller disc is cut from the polar material then centred(accurately)on the disc and accurately crossed and fixed in place.(see photo)
You will need to make the centre stop a different size for each of your objectives. Only the centre stop should be seen in the back focal plane of the objective.
The stop is placed in the filter holder below the condenser and a second polariser is placed on the light source.
When either polariser is rotated contrast is increased until darkfield.
It also increases resolution with higher powers
You can also achieve colour by placing a piece of hard clear plastic in the lightpath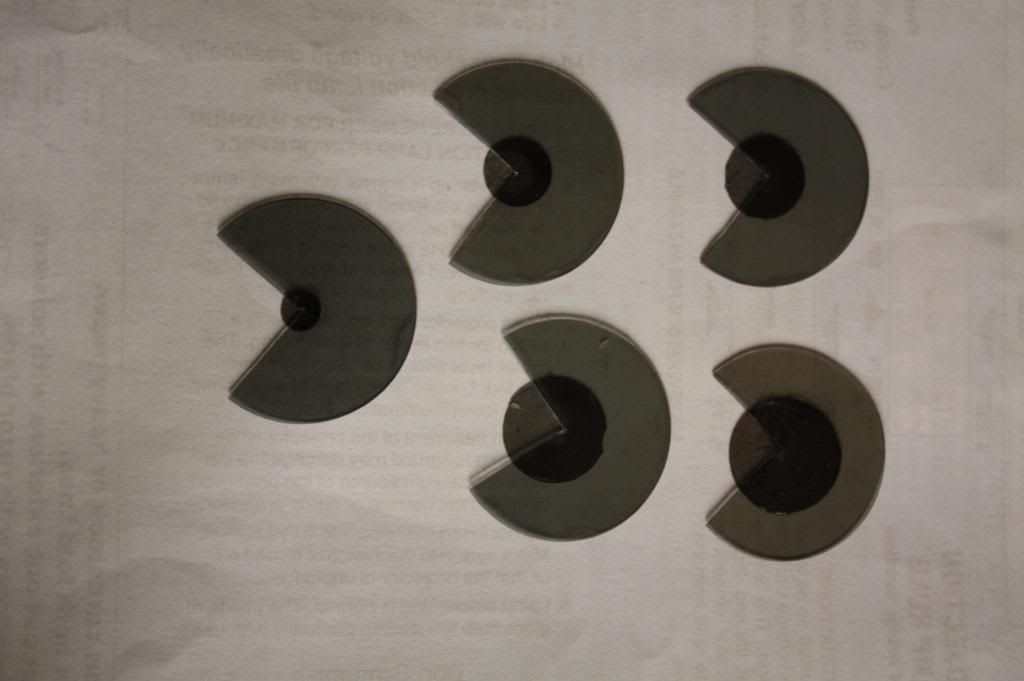