
 Home
Home

 Offline


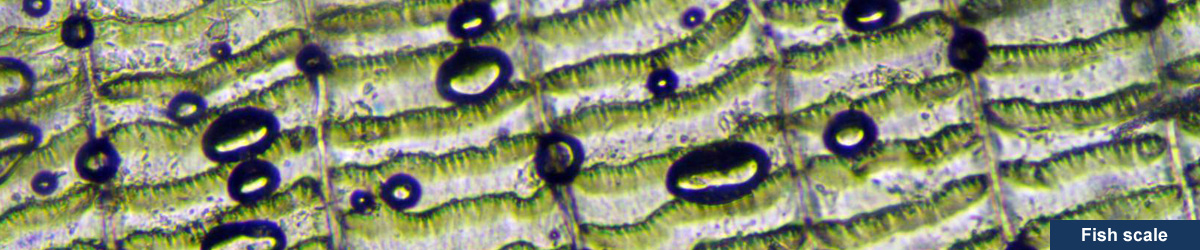
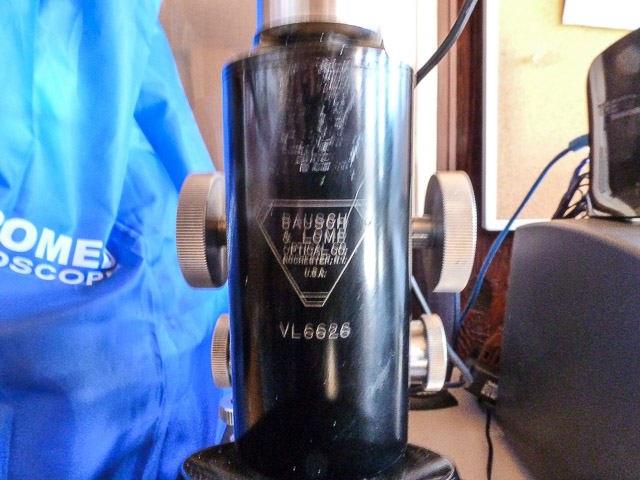
1950s B&L meets modern Canon 400D DSLR


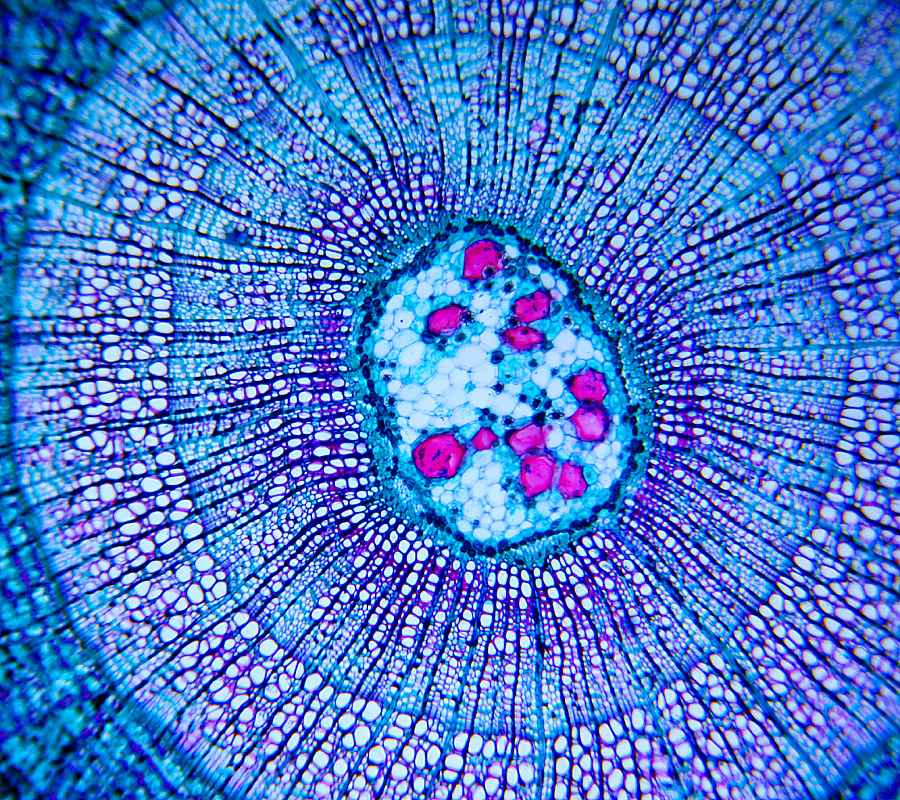
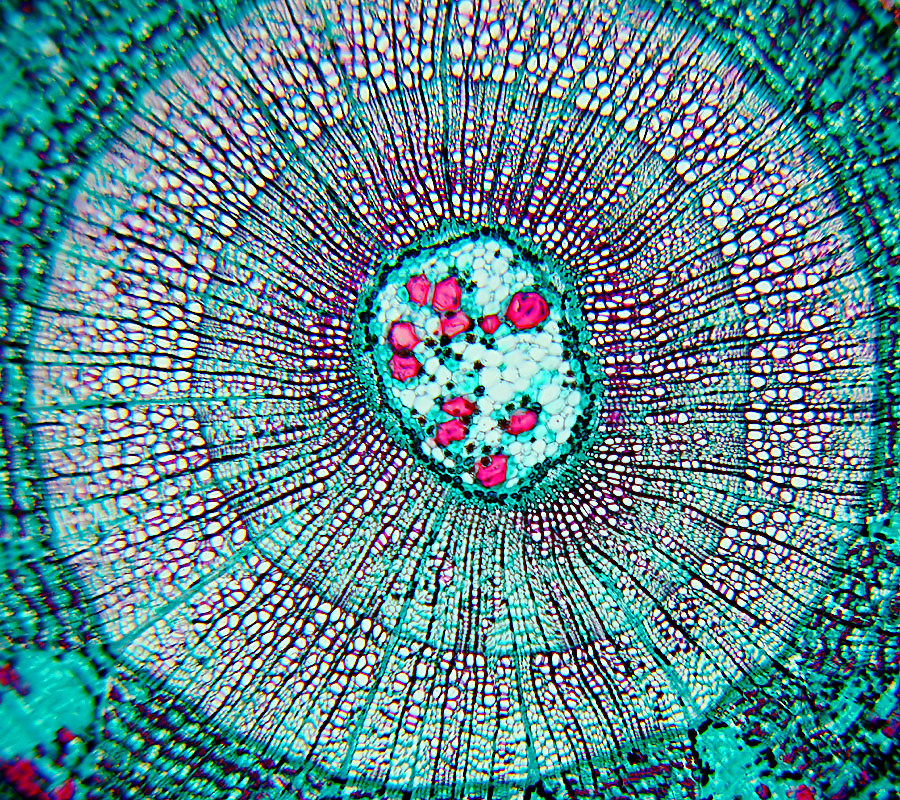
Plant stem cross section stained

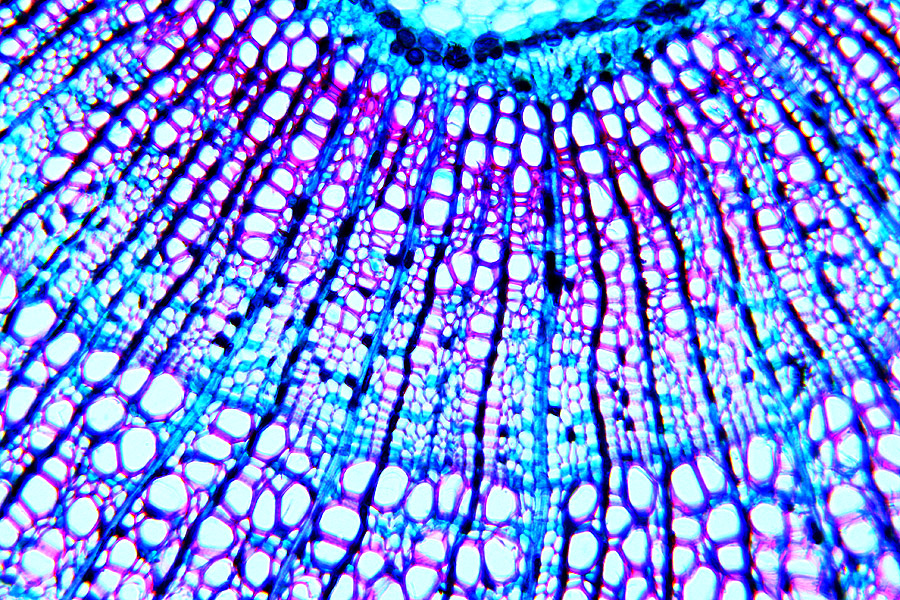
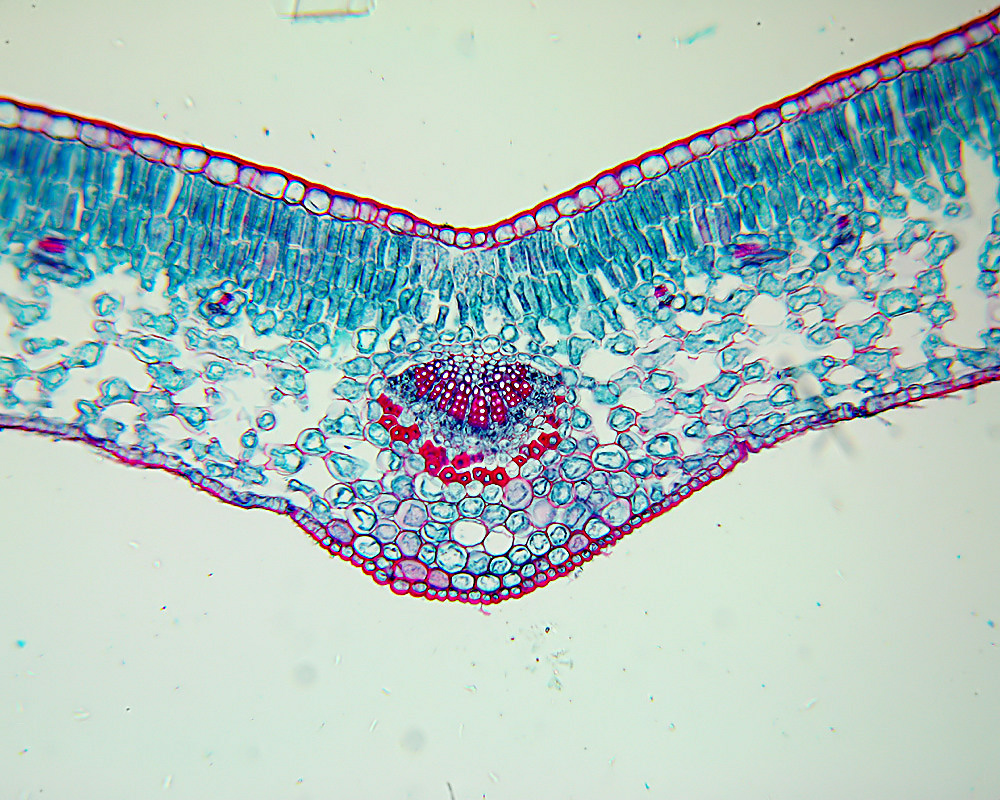
Leaf section stained

Diatoms


Paramecia stained

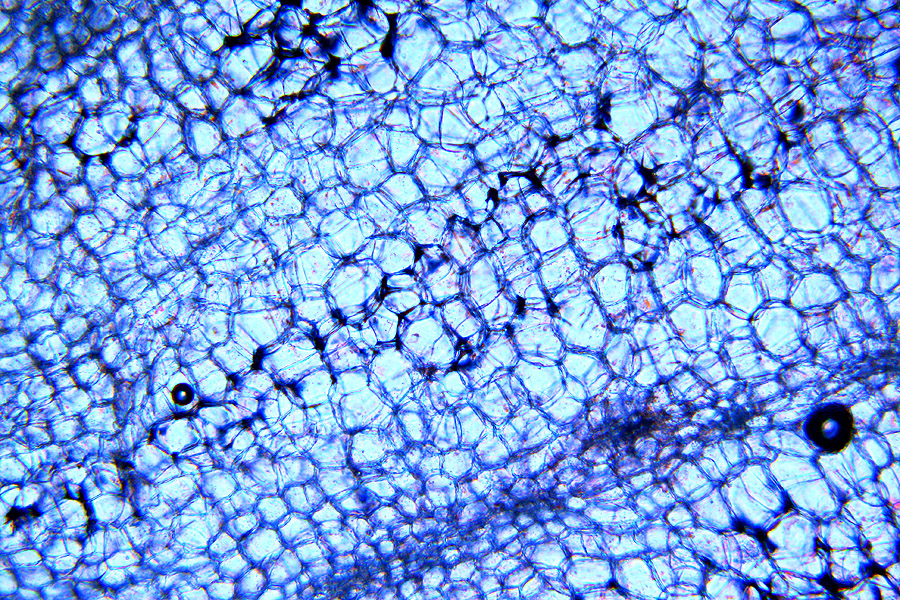
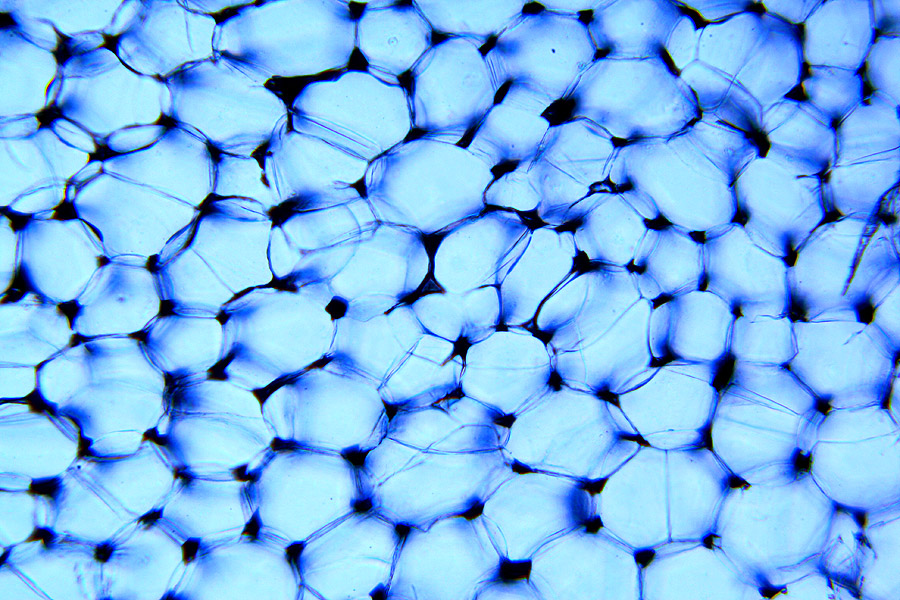
Tissue section

Carrot cross section

Celery cross section

Hello and wellcom EJN
It shows that expensive kit isn't needed to produce excellent results,I particularly liked the images of the plant cross section(no3)and the diatoms.
Are the carrot and celery cross sections hand cut?
Well done
Tony
East Riding of Yorkshire(UK)
Nice setup.
I have a similar microscope of about the same vintage.
I have upgraded it somewhat with a new condenser. LED lighting and Plan objectives.
The microscope cost $75.00 in 1980 and still represents a bargain compared to a new microscope.


Welcome EJN to the forum! I agree with Tony and Peter. I find your microscope setup especially pleasing esthetically, and the photos produced with it are beautiful. No built-in lighting or trinocular head needed to get excellent results, only an excellent quality ageless instrument and an expert operator. Thank you for sharing this.

Thanks.
As for the slides I used - the plant stem, leaf section, & tissue section are commercial slides.
The Paramecia & Diatoms are permanent slides I made a number of years ago.
The carrot & celery sections were hand cut, and photographed as temporary wet mounts.
I have a second, modern, inexpensive (Chinese) microscope (see attached pic). I have just done some test shots with it and they look to be of comparable quality to the B&L images. I will post them once I download them from the camera.

Here are some photomicrographs made with the scope pictured above.
The scope uses a fluorescent bulb for illumination, so the color balance is slightly shifted.
The DIN objectives appear to have slightly more field curvature and chromatic aberration than the Bausch & Lomb objectives.
The setup
The images


The technical details:
With both scopes, the extension tube is an eyepiece projection adapter for telescopes screwed into the T-ring. The adapter is for 1.25" focuser, the focuser tube was unscrewed and the extension tube does not physically touch the microscope eyepiece tube, the camera is completely isolated from the microscope and supported by the tripod only.
A 5x Huygens eyepiece was used for eyepiece projection – I want to get a better corrected modern 5x eyepiece.
Camera: Canon EOS 400D (Rebel XTi) – pre-Live View.
ISO 400
Average white balance (AWB)
Aperture priority
Evaluative metering – set to -1 EV exposure compensation
Exposure times ranged from 1/15 sec. to 1/40 sec.
Mirror lockup – on Canon cameras the is a custom function (CFn)
2-sec. self timer used – when the shutter button is pressed, the mirror locks up, 2 seconds elapse, then the shutter fires.
Image type: highest quality JPEG setting (RAW is generally too much work)
All images post-processed in Photoshop to adjust levels, curves, brightness & contrast.
Sensor noise removal was done with Neat Image.
Hi EJN,
Thank you: very nice, and I'm amazed that you get such excellent results with a monocular scope and camera without live view. How do you see what you are doing? Both sets of images look very good to me. The color balance on the 2nd set is better, though. I always use "Manual" or "Custom" White Balance (I use a blank area of the slide to set it). I don't think "Auto White Balance" necessarily works well in some circumstances, but when I forget, it is also possible to correct it later in editing by using the "eyedropper" on a background area of the image to convert it to gray/white. I also physically isolate the camera from my microscope as otherwise shutter vibration resulted in very blurry images.
Most Users Ever Online: 149
Currently Online:
8 Guest(s)
Currently Browsing this Page:
1 Guest(s)
Member Stats:
Guest Posters: 31
Members: 593
Moderators: 0
Admins: 1
Forum Stats:
Groups: 2
Forums: 18
Topics: 1403
Posts: 5585
Newest Members: mariareese, Habibie, EoinFirestorm, Peniko177, Microseeshirt, SteveRichfield
Moderators:
Administrators: Oliver (201)
